EAC .flac ripping. v2.1
A guide to rip your music CD's into the lossless file format FLAC.
This guide covers the EAC Version 0.95 Beta 4.
This guide only explain how to use EAC and FLAC to rip your CD to the FLAC file format
Use Google to search for help ripping e.g. into MP3 file format.
Related information and programs.
Slim Device, the producer of the Transporter and Squeezebox, here you find download of the server program "SlimServer", FAQ and forum.
If you don't have a Transporter or a Squeezebox, you can use the Softsqueeze, witch is a software version.
If you don't have time, money or other reasons to not install your own server, you can use the SlimCD, witch is a bootable CD-Rom inc. SlimServer preinstalled and ready to run.
After ripping your CD's you properly find some error's in your tag's, a solution could be the program Tag & Rename, with this you can change in existing files.
You might have a MP3 player to use when not at home... To convert and manage this you might use the Media Monkey, Media Monkey even handles tag's.
Information and programs needed prior to EAC program-setup.
Download the EAC program and install the program, don't run the EAC program now.
Download the FLAC, codec and install the codec.
Download the file wnaspi32.dll, after downloading the ZIP file place the wnaspi32.dll file found in the ZIP file in the EAC program folder (C:\Program Files\Exact Audio Copy). After installing EAC, Flac and copying the dll-file, reboot the computer.
Under the setup of the EAC program you will need information about the read sample offset correct value for the CD-drives in your system, you'll find them here.
Hardware and Windows version's.
I have used EAC/Flac on 750Mhz, 1Ghz, 2.4Ghz and 2.6Ghz computers running Windows 2000 or Windows XP Pro. Iím using a 2,8Ghz with Windows 2000 Server as platform for my SlimServer software (right now I have 384 albums/5060 songs using a total of 123,5Gb). Currently I'm using both the 2.4 and the 2.6 computers, both running Windows XP Pro and 2 CD/DVD-Drives. Running two instances of the EAC program on both the computers, this way I can rip 4 CD's at the same time. I use both CD/DVD and clean CD drives, one of each in both the computers, it's my experience that the old clean CD drives are the best drives for ripping music CD's. Very often the old CD drives can read CD's that the CD/DVD drives can't read properly. When ripping Music-CD's with copy protection both old and new drives can be the best, thatís just to try it out. When having many windows open at one time, be carefully not to check the "Power Down" checkbox accidentally.
Step 1.
How to setup the EAC/Flac program.
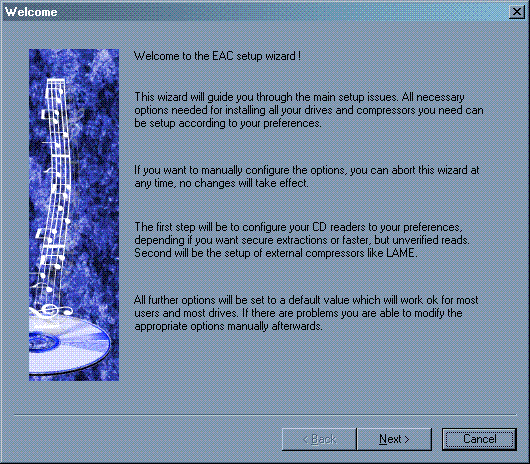
Start EAC, when the "Setup Wizard" shows up, press [Cancel].
Step 2.
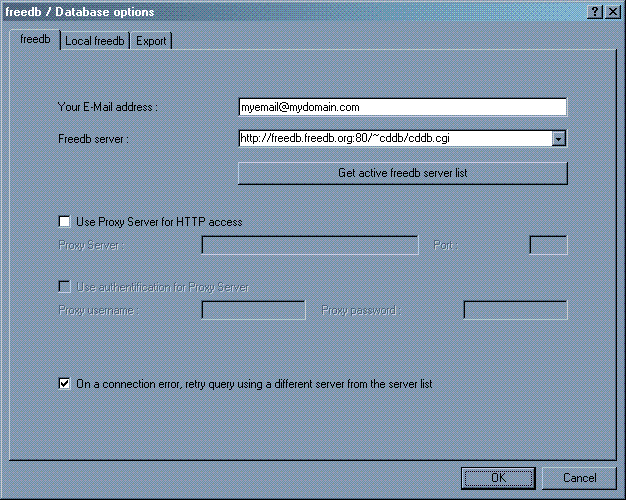
Press [F12] to open the "FreeDB Options".
Type in your e-mail address in "Your E-Mail address:".
Press [OK] to close the "FreeDB Options" window.
Step 3.
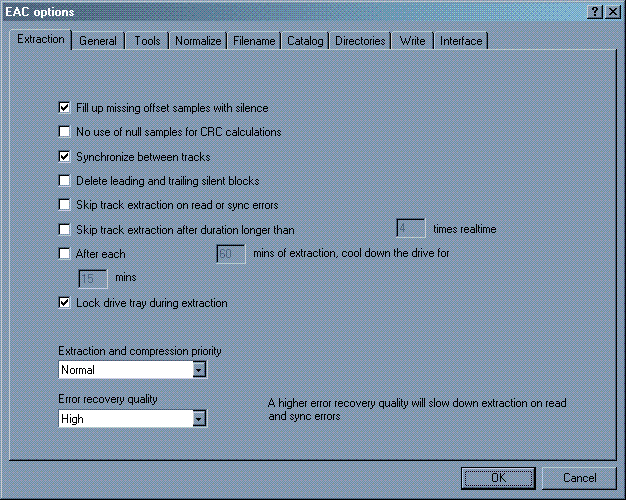
Press [F9] to open the "EAC Options".
Press [Extraction] tab.
Check "Fill Up Missing Offset Samples With Silence".
Check "Synchronize Between Tracks".
Select "High" in the "Error Recovery Quality" drop down list.
Step 4.
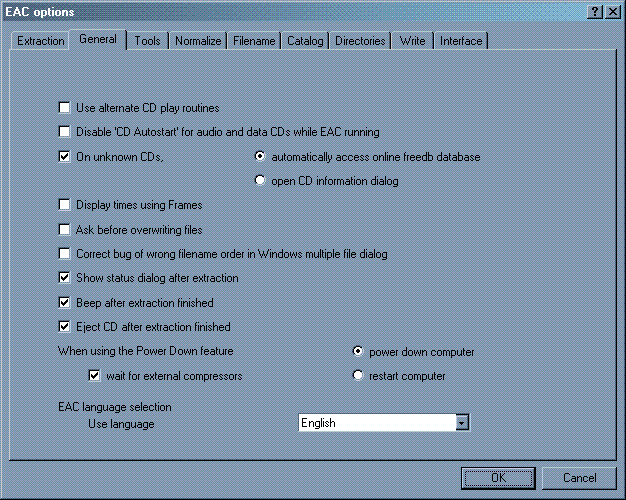
Press [General] tab.
Check "On Unknown CDs".
Check "Automatically Access Online FreeDB database".
Step 5.
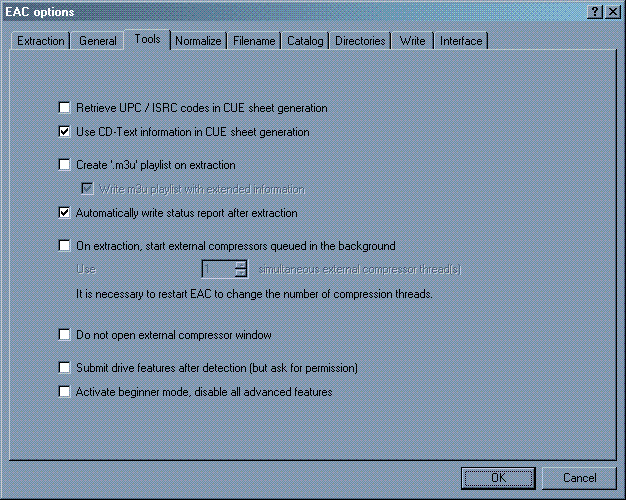
Press [Tools] tab.
Check "Use CD-Text Information In CUE Sheet Generation".
Check "Automatically Write Status Report After Extraction".
You can check "Create '.m3u' Play list On Extraction" if you want, but the SlimServer don't use it, but other programs might.
Step 6.
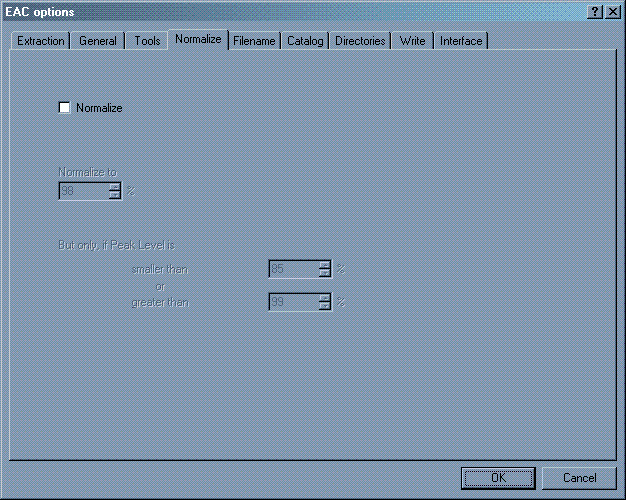
Press [Normalize] tab.
DO NOT check this, DO NOT use Normalizing in any way.
Step 7.
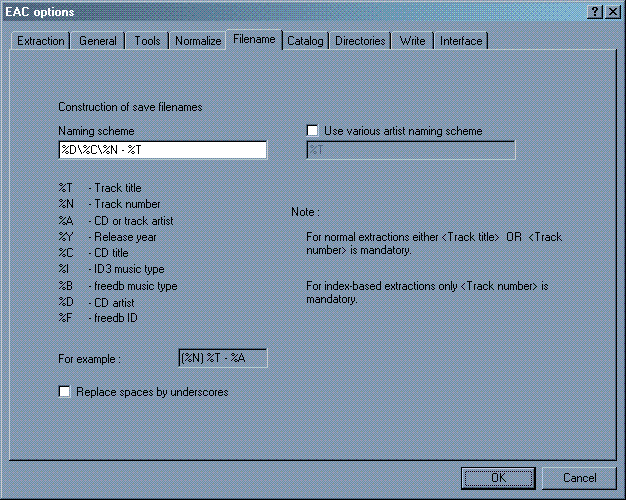
Press [Filename] tab.
Fill in "Naming Scheme" as you want it, I'll use "%D\%C\%N - %T" this creates automatically Artist and Album folders.
Press [OK] to close the "EAC Options" window.
Step 8.
Press [F11] to open the "Compression Options".
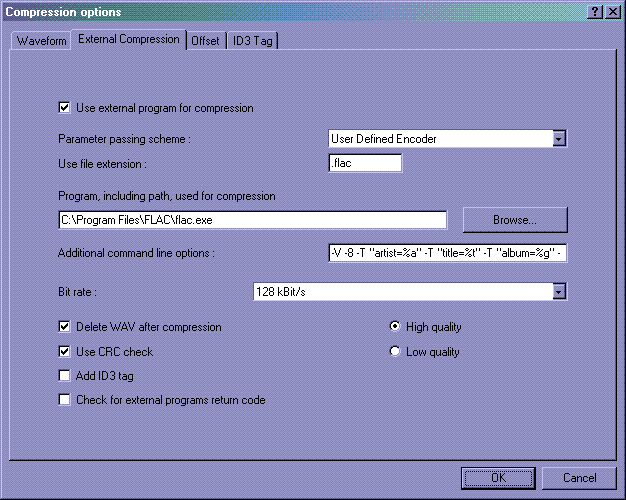
Press [External Compression] tab.
Check "Use external program for compressing".
Select "User Defined Encoder" in the "Parameter passing scheme:" drop down list.
Type in ".flac" in the "Use file extension:" field.
Type in "C:\Program Files\FLAC\flac.exe" in the "Program, including path, used for compression" or use the [Browse] button.
Type in "-V -8 -T "artist=%a" -T "title=%t" -T "album=%g" -T "date=%y" -T "tracknumber=%n" -T "genre=%m" %s" in the "Additional command line options:" this ensures that tag's in the Flac file is filled in.
"Bit rate:" has NO effect on the FLAC decoder
Check "Delete WAV after compression".
Check "High quality".
Check "Use CRC check".
Press [OK] to close the "Compression Options" window.
Step 9.
Now insert a Music-CD in all of your CD-drives, check out that all of your drives are found in the drives drop down list in the main window. Problem? Check out that the wnaspi32.dll file are at place as described above in the EAC folder.

Step 10.
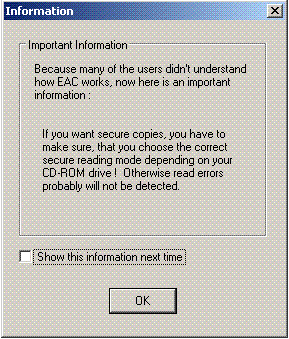
Now press [F10] to open the Drive Options "Information" Window.
Now check or uncheck "Show this information next time" as you prefer.
Now press [OK] to open the "Drive Options".
Step 11.
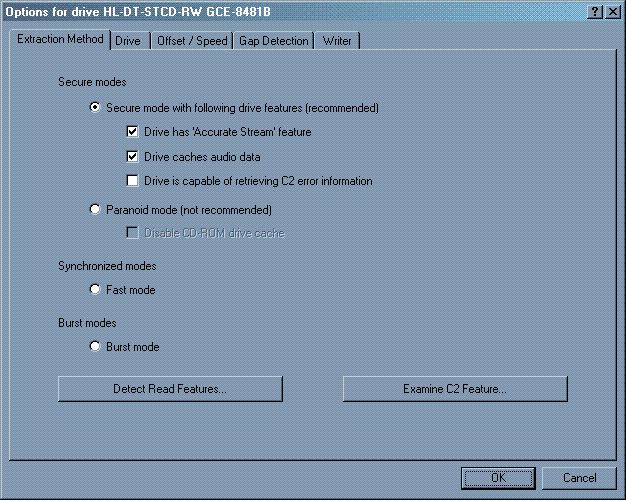
Press [Extraction Method] tab.
Check "Secure mode with following dr.....".
Check "Drive has 'Accurate Stream' feature".
Check "Drive caches audio data".
Step 12.
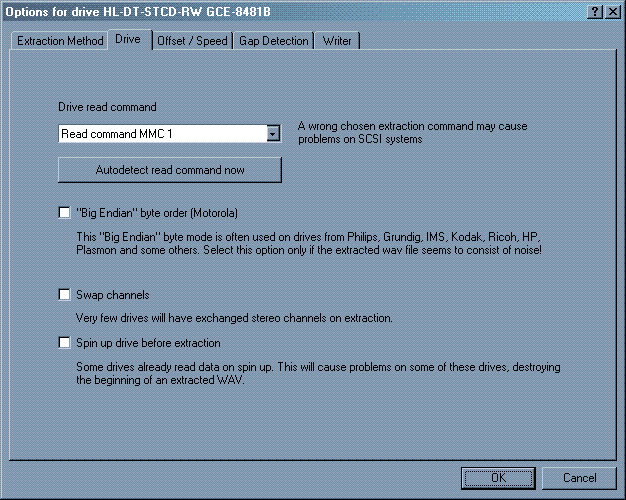
Press [Drive] tab.
Press [Autodetect read command now] to determine the "Drive read command". This only works if that Music-CD from Step 9. is in the drive, so make sure that a Music-CD is in the drive. If [Autodetect read command now] don't comes up with a hit, your drive properly can't be used, it might be too old e.g.
Step 13.
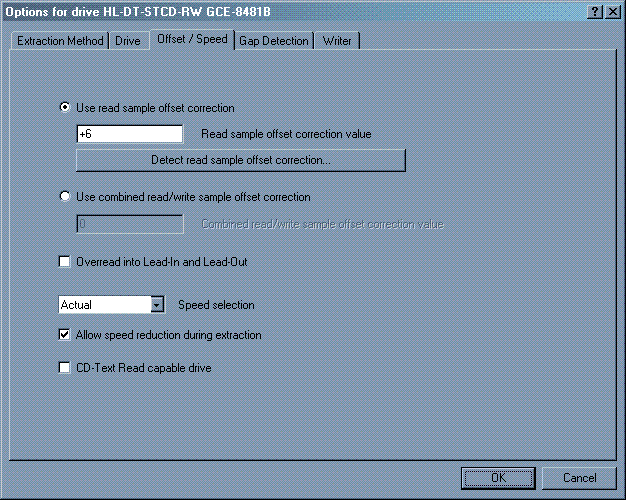
Press [Offset / Speed] tab.
DON'T press [Detect read sample offset correction...] to determine the "Read sample offset correction value". Now use this link to find the value for your drive to type in. The value off "+6" is ONLY a sample.
Step 14.
Press [Offset / Speed] tab.
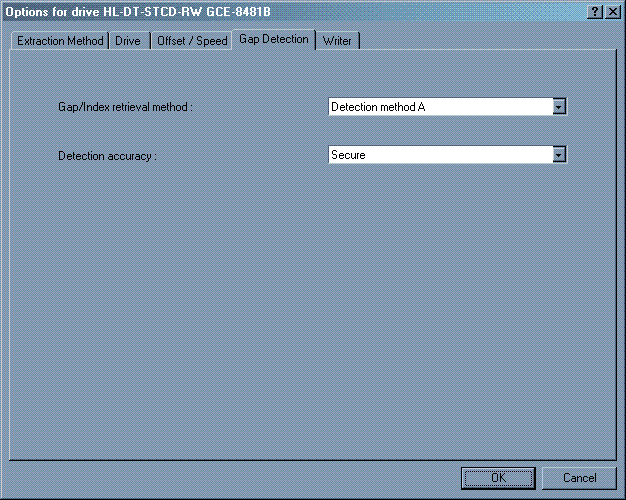
Select "Detection method A" in the "Gap/Index retrieval method:" drop down list. If you are having problems reading Gap/Index try out B or C for that drive.
Select "Secure" in the "Detection accuracy:" drop down list.
Now press [OK] to close the "Drive Options" window.
Step 15.
Now repeat Step 10 to Step 14 for every drive found in Step 9.
Now press [New] in the bottom of the main window, type in the name for your setup, e.g. MyDefaultFlacSetup. After naming it press [Save].
When finished all your drives, remove all your CD's from the drives and the setup of the EAC program is finish.

Now proceed to Step 16. to learn more about ripping those Music-CD's off yours.
Step 16.
How to use the EAC/Flac program to rip a Music-CD.
Basically its just to insert a Music-CD, press [F4], wait to the Gaps are found, press [Shift]+[F6] and then its rolling. But let's take a look.
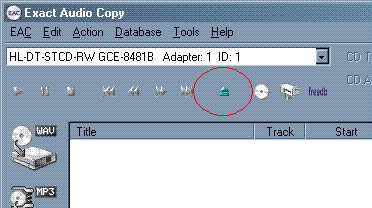
Place a Music-CD in your drive, select the same drive in the drop down list in the main window and then press the Load/Eject button in the main window.
Step 17.
Now one of four things can happen. 1. You can't get access to the database with the CD information, or 2. your CD isn't found in the database.
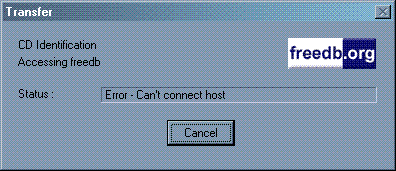
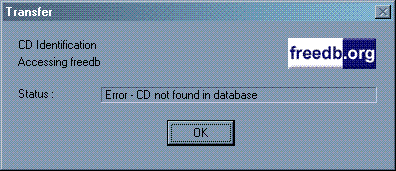
In both cases you'll end up with a "empty" CD.
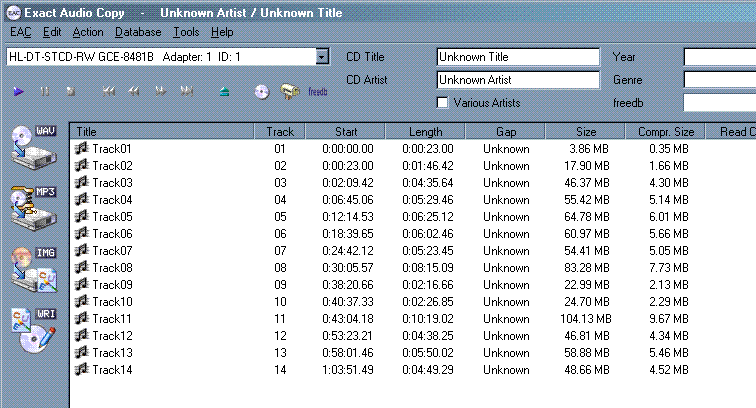
Now fill in all the fields, so that they match the Music-CD you are ripping, to edit the tracks, press [F2] , when finish, press "PostBox" button.
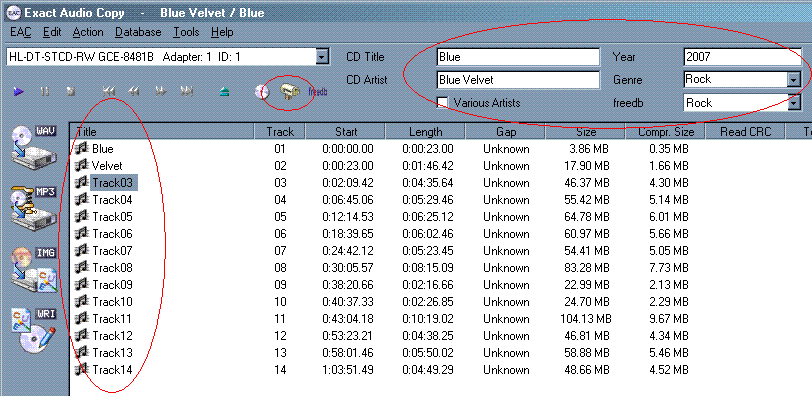
Step 18.
3. You can get a list of possible CD's in the database, or 4. There is just one match in the database. If you get a list, pick the Music-CD from the list that look like matching your Music-CD.
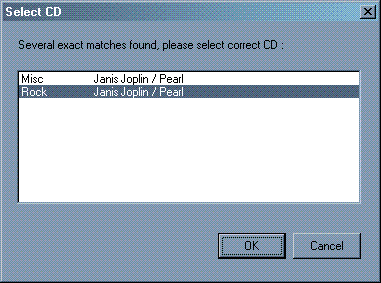
In both cases, check all fields found in the database, so that they match your Music-CD.
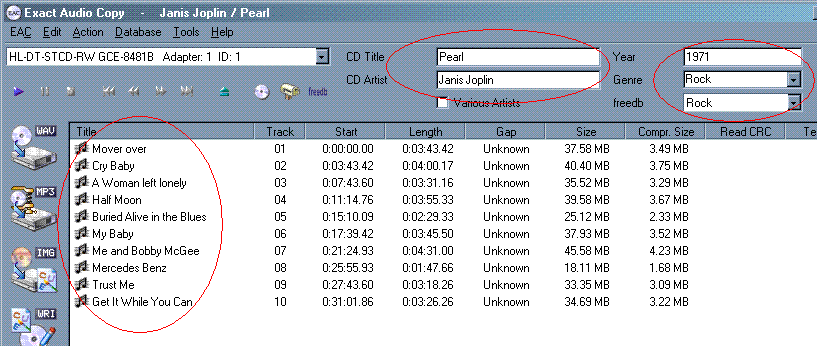
Step 19.
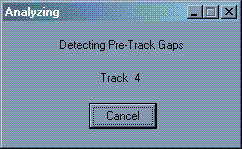
The Squeezebox need some more information to play a album right, it need's the gap between the tracks on the album. Press [F4] and the EAC will scan the Music-CD for gaps information.
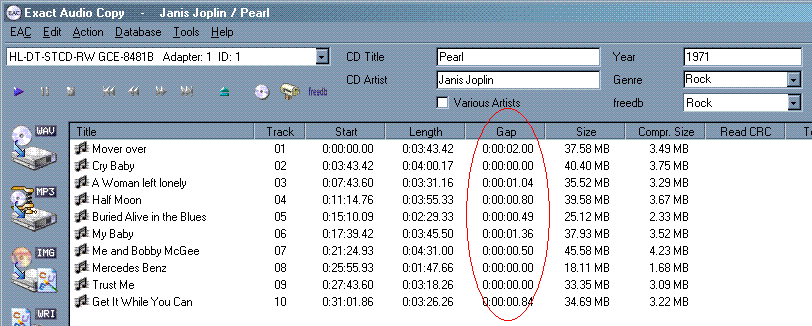
Here you can se that the column "Unknown" is replaced with information about the gaps.
Step 20.
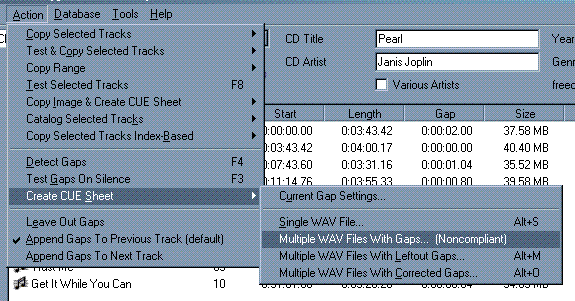
Flac files can be used to make a new CD from.... But, then you have to have the Gaps saved in a file first. Save your Gaps in a file from the following menu point: "Action | Create CUE Sheet | Multiple WAV Files With Gaps... (Noncompliant)". But remember that this file is only needed when you want to make a new CD, I'll never save the CUE file, it's quick to make when needed.
Step 21.
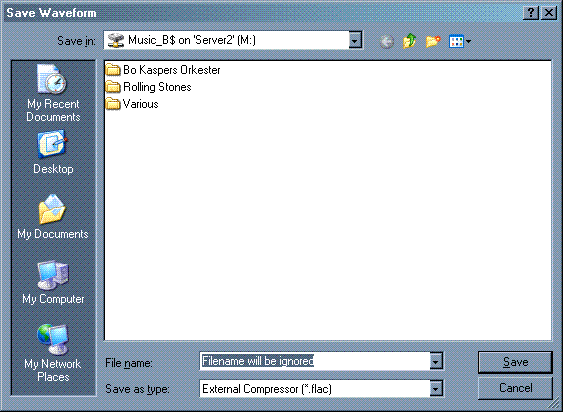
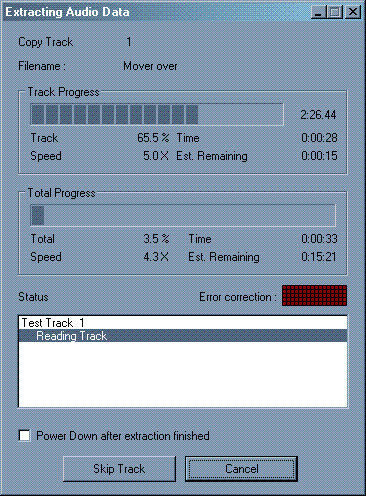
Now you are ready to start the ripping of your Music-CD. Press [Shift]+[F6], (use [F5]... and ONLY [F5] if you want your files saved in the WAV format and not the Flac file format) now in the windows dialog box, select the place where you want your music albums to be saved, then press "Save" (or [Enter]). The ripping process starts, a windows pops up so you can monitor the progress.
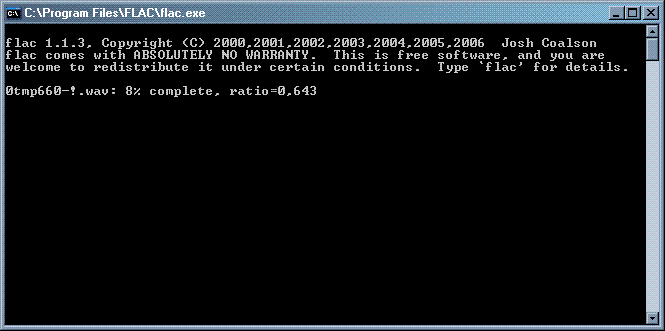
Every time the Flac program works, this window is shown.
Step 22.
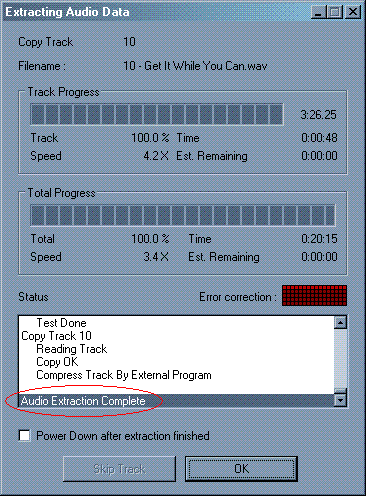
When the ripping process is finish, the progress-window look like this. If you made all the settings in the setup process like shown in this guide, the speaker would have made a little noise and the drive with your Music-CD is ejected. Press "OK".
Note that 20 min. was used to rip this album, thatís a small album, only holding 35 min. of music, a full stuffed album can take 45 min. or more to rip, and that is if there's no reading problems.
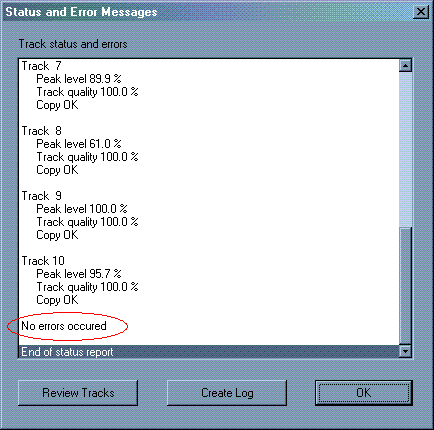
Again, if you made all the settings in the setup process like shown in this guide, this windows will appear, I use it to just read that little text "No errors occurred". Press "OK" and you are finish.
The paper version.... I mean if you read this guide in a printed paper version, here come's the links written out, so
that you can type them in manually in your browser.
Related information and programs.
Slim Device: "http://slimdevices.com/".
Softsqueeze: "http://softsqueeze.sourceforge.net/"
SlimCD: "http://www.herger.net/slim/detail.php?nr=763"
Media Monkey: "http://mediamonkey.com/download.htm"
Tag & Rename: "http://www.softpointer.com/tr.htm/"
Information and programs needed prior to EAC program-setup.
EAC: "http://www.exactaudiocopy.de/"
FLAC: "http://flac.sourceforge.net/"
wnaspi32.dll: "http://www.dll-files.com/dllindex/dll-files.shtml?wnaspi32"
Offset correct value: "http://accuraterip.com/driveoffsets.htm"
Enjoy your ripping
/Rip
konsert koncert consert concert saxtorpfoto saxtorp foto saxtorpfoto.se saxophone altsax fotograf nikon d800
konsert koncert consert concert saxtorpfoto saxtorp foto saxtorpfoto.se saxophone altsax fotograf nikon D800